10 Best Halloween Nail Ideas for 2026: Spooky-Cute Designs to Try
Black and orange French tips, cute ghosts, spider webs and candy corn: the 10 best Halloween nail ideas for 2026, with beginner-friendly how-tos and tips to make nail art last.
In this article
Halloween is the one time of year when your manicure is allowed to be a little ridiculous. Ghosts with tiny faces, glossy candy corn stripes, a single eyeball staring up from your ring finger: it all works in October. And if you'd rather keep it subtle, there are plenty of spooky sets that still pass the office test. Below are the 10 best Halloween nail ideas for 2026, from easy black-and-orange French tips you can paint the night before a party to nail art that will get you compliments at every trick-or-treat stop.
Every idea includes the colors to use, the nail shape that suits it and simple steps to recreate it at home or explain it to your nail tech. Save your favorites, then scroll down for tips on making Halloween nail art last and answers to the most common questions about spooky manicures. Want more seasonal inspiration? Browse our seasonal nail ideas or every design tagged Halloween.
Halloween nail ideas at a glance
| # | Idea | Best for | Difficulty |
|---|---|---|---|
| 1 | Black and orange French | Office-friendly spooky | Easy |
| 2 | Cute ghost nails | Spooky-cute lovers | Easy |
| 3 | Pumpkin patch nails | Fall parties | Medium |
| 4 | Spider web accents | Classic Halloween | Medium |
| 5 | Candy corn nails | Trick-or-treating | Easy |
| 6 | Bat silhouettes | Minimalists | Easy |
| 7 | Vampire blood drip | Costume parties | Medium |
| 8 | Skeleton bone nails | Statement lovers | Medium |
| 9 | Eyeball nails | Maximum spooky | Advanced |
| 10 | Black cat nails | Cute and witchy | Medium |
1. Black and orange French tips
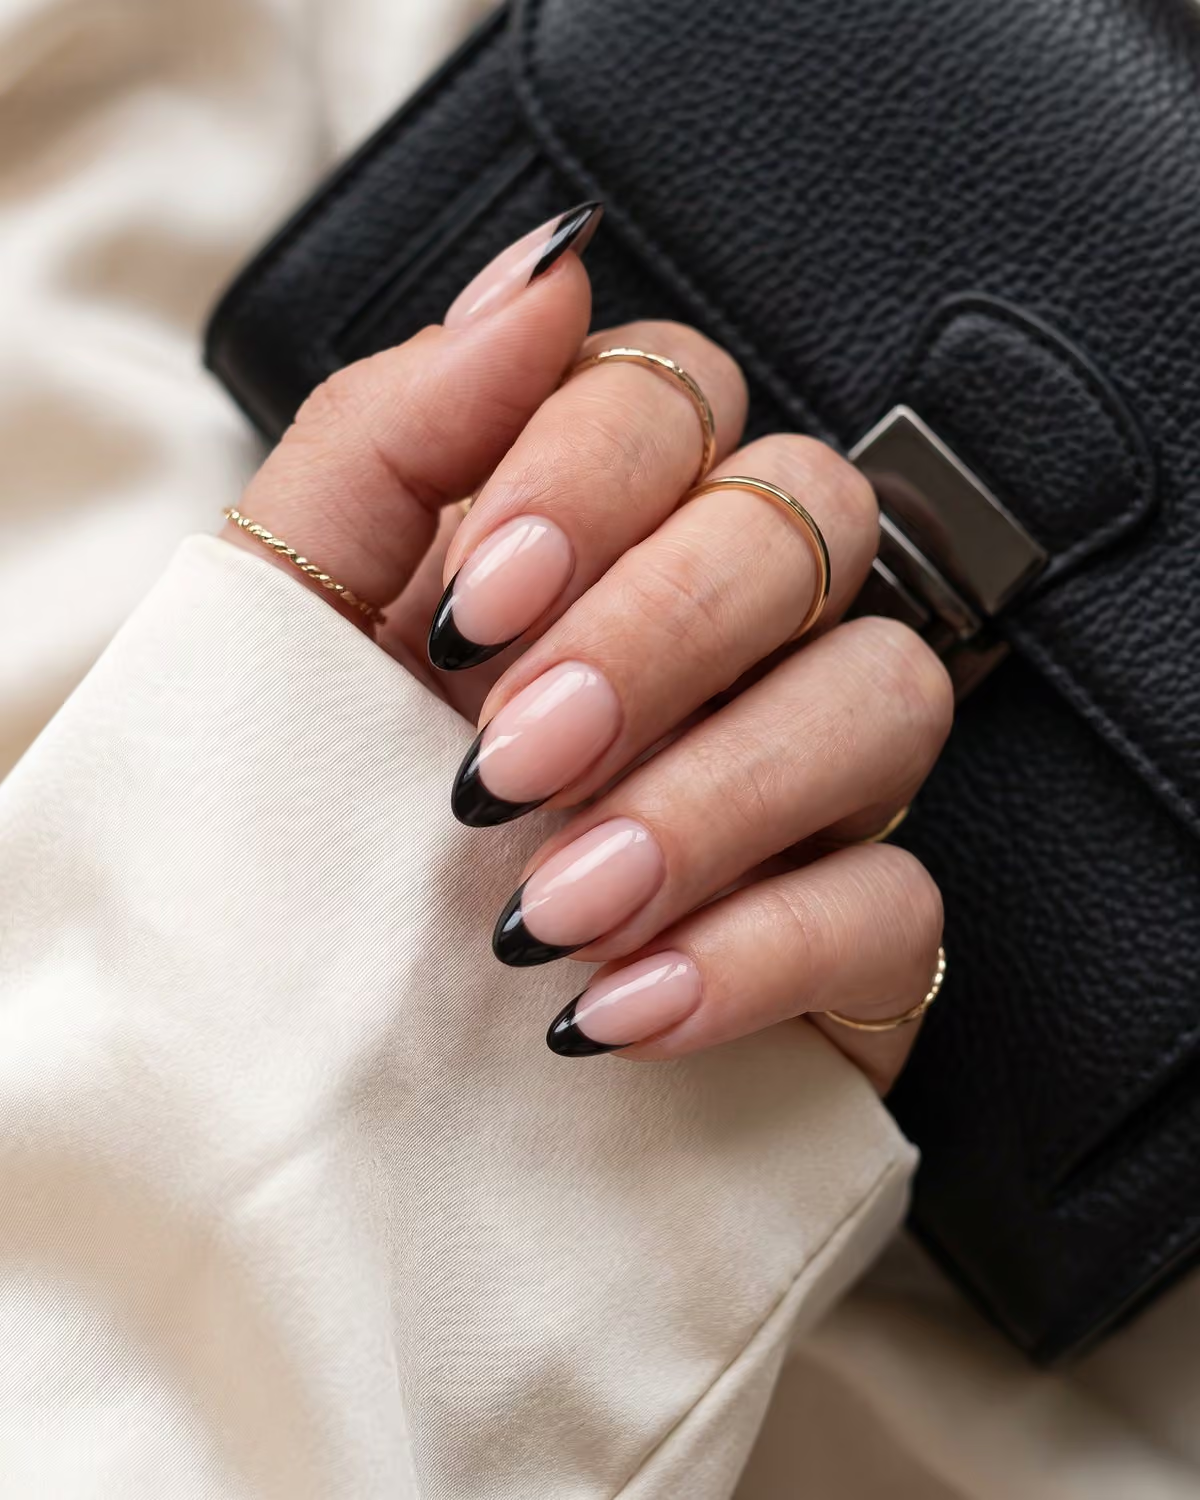
If you want a Halloween manicure that still looks grown-up, start here. A sheer nude base with alternating black and orange French tips is instantly seasonal, but it is clean enough for the office, a family dinner or a work video call. It's the Halloween version of a classic, and it grows out beautifully.
Why it works: French tips cover only a sliver of the nail, so the bold Halloween colors read as an accent rather than a costume. Alternating the two shades makes the set feel playful without any nail art.
How to get the look:
- Apply a base coat, then one or two coats of a sheer pink or beige polish.
- Paint the tips with a thin striping brush, or press a silicone French stamper into black polish and roll it over the free edge.
- Repeat on alternating nails with a bright pumpkin orange.
- Clean up the smile line with a small brush dipped in remover, then seal with a glossy top coat.
Best nail shape: almond or oval. The curved smile line looks sharpest on a tapered nail. For more ways to wear this style all year, see our guide to French tip nail ideas.
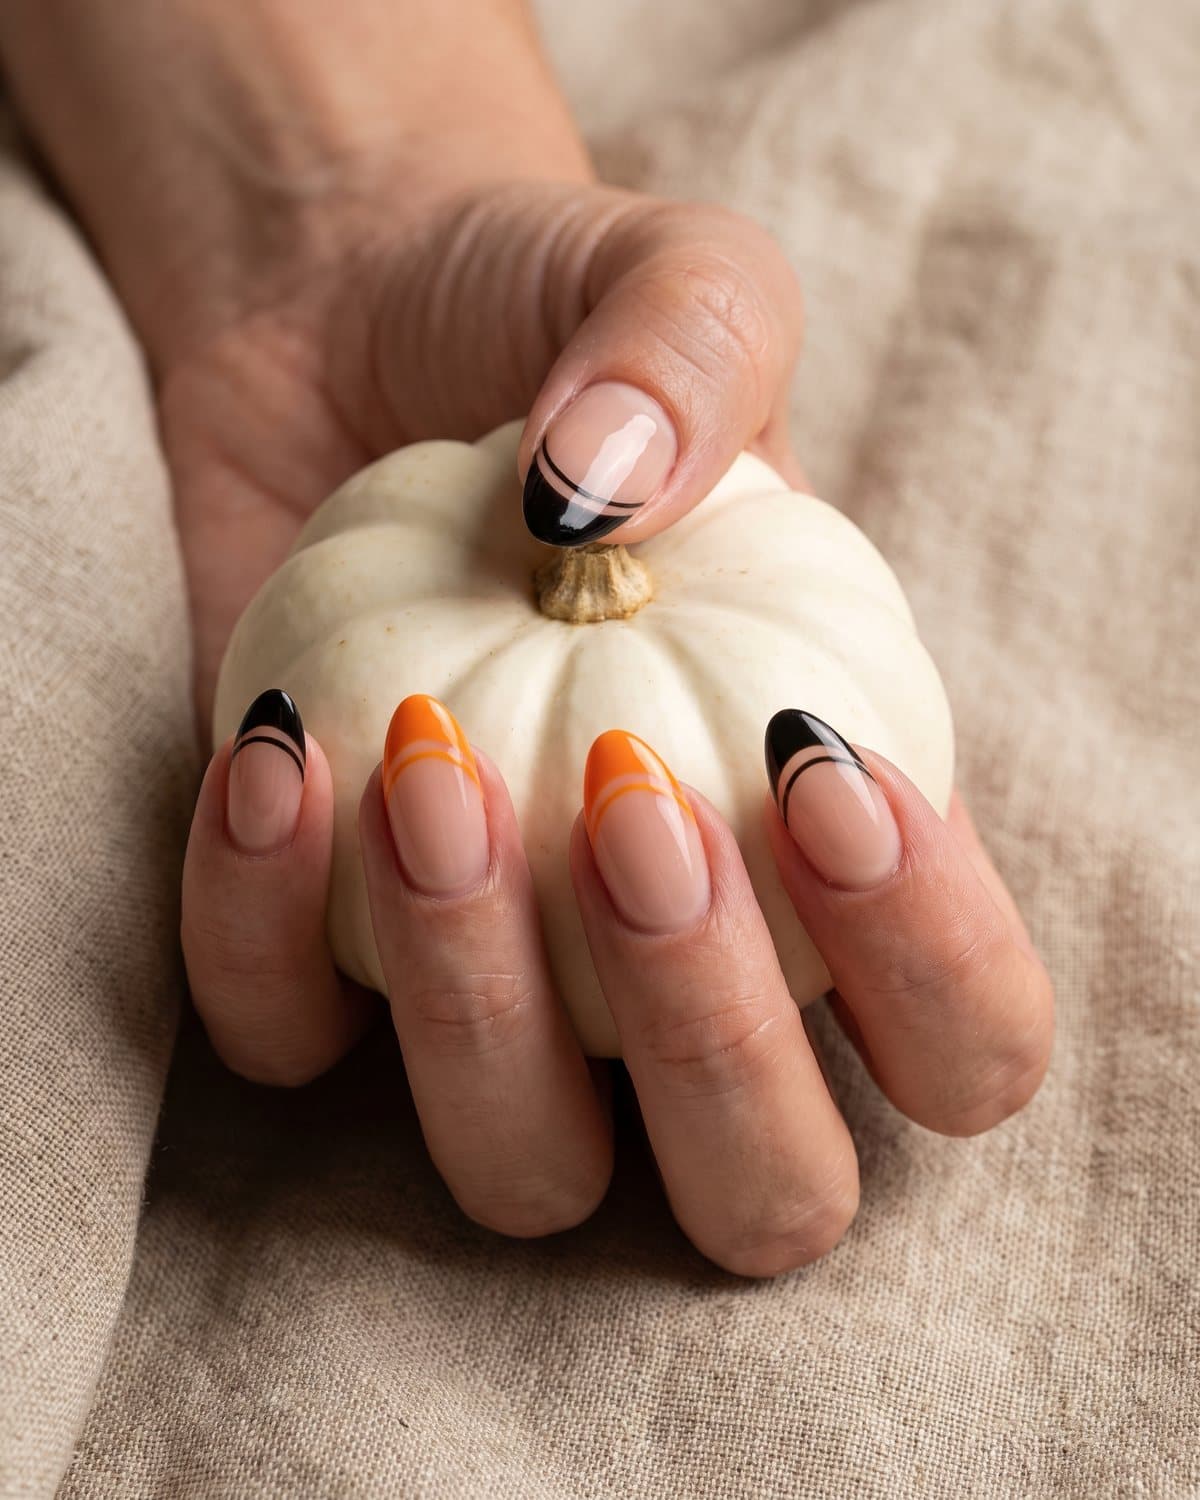 Black and orange French tips: the easiest office-friendly Halloween manicure
2. Cute ghost nails
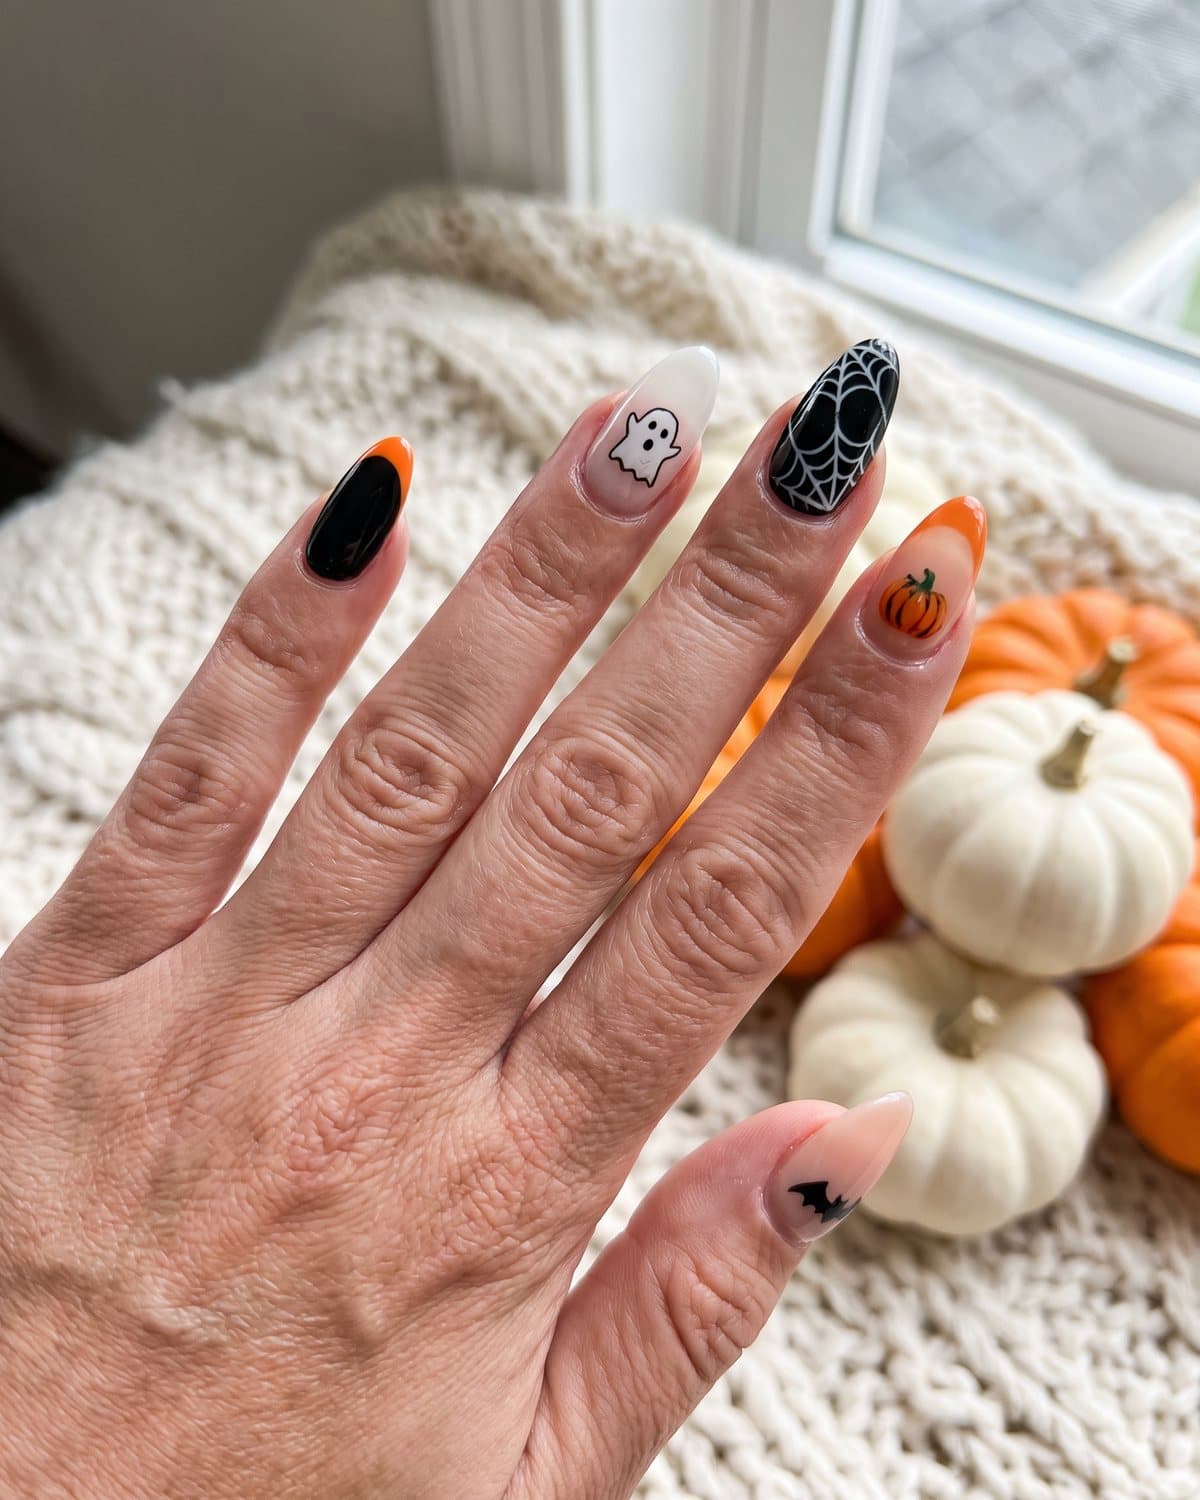
Ghost nails are the poster child of "spooky-cute," and they are far easier to paint than they look. A milky white base, two black oval eyes and a little open mouth are all you need. The result is more charming than scary, which makes it perfect if you'll be around kids or simply prefer cute over creepy.
Why it works: the design uses only two colors and three dots, so even beginners get a clean result. A milky white base looks softer and more modern than an opaque bright white.
How to get the look:
- Paint two coats of a milky or sheer white polish.
- With the small end of a dotting tool, place two black oval eyes slightly above the middle of the nail.
- Add a tiny vertical oval below for an "oooh" mouth.
- Optional: draw a wavy ghost outline with a fine brush on a nude nail for a second version.
- Let the dots dry for at least five minutes before your top coat so they don't smear.
Make it yours: put a ghost on one accent nail per hand and keep the rest glossy black, or add a tiny pink blush dot under each eye for an extra-cute touch inspired by our cute nail ideas.
3. Pumpkin patch nails
Pumpkins bridge Halloween and Thanksgiving, so this is the set to choose if you want a manicure that lasts all of October and into November. Paint solid orange nails with a simple pumpkin outline, or go for a tiny carved jack-o'-lantern face on one accent.
Why it works: orange is warm and flattering on most skin tones, and pumpkins feel festive without being frightening. Keep a few nails plain so the set breathes.
How to get the look:
- Paint two coats of a creamy pumpkin orange.
- Use a fine brush and a slightly darker orange or brown to draw curved vertical lines that suggest pumpkin ribs.
- Add a tiny green stem at the top of the nail near the cuticle.
- For a jack-o'-lantern, paint two black triangle eyes and a zigzag smile instead of the ribs.
- Finish with a glossy top coat, or matte for a velvety, real-pumpkin texture.
Best nail shape: squoval and round shapes make the pumpkin look plump; almond works for the jack-o'-lantern face.
4. Spider web accents
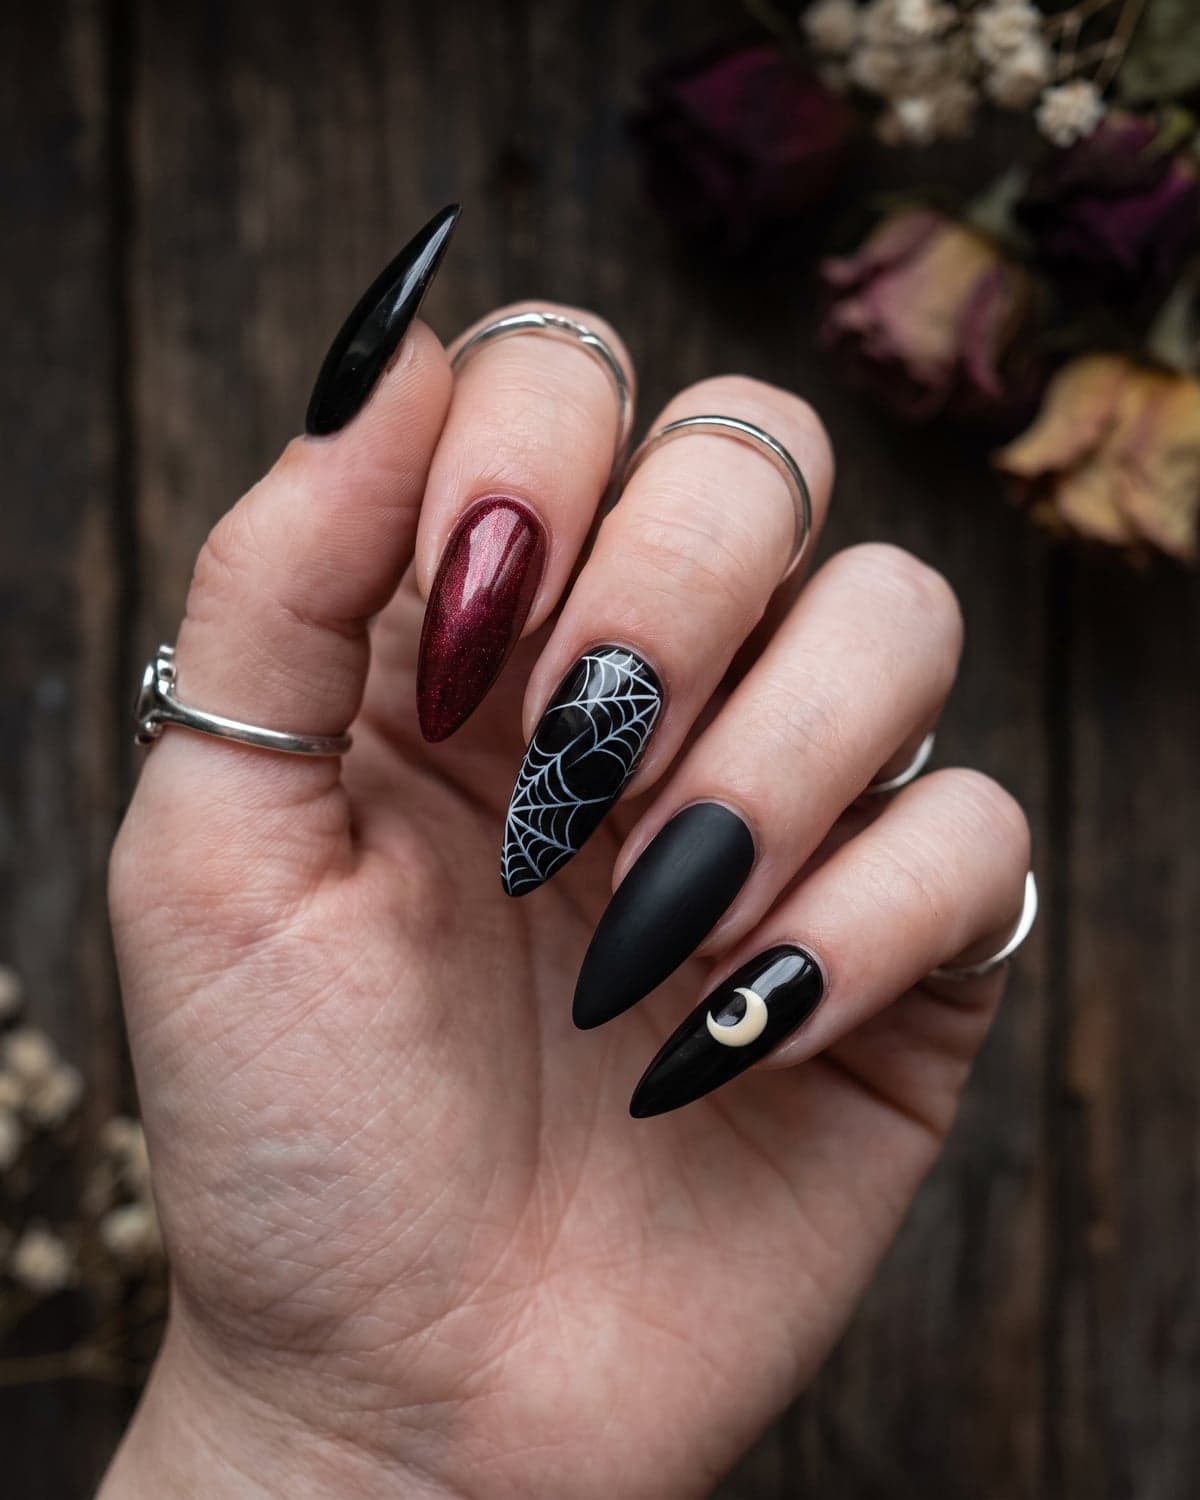
Spider webs are the most classic Halloween nail art for a reason: they are graphic, instantly recognizable and look good in almost any color combination. White webs on black are timeless; black webs on nude or orange feel lighter.
Why it works: a web is just a few straight lines and some curved connectors, so it's forgiving. Placing the center of the web in a corner of the nail looks more modern than a centered web.
How to get the look:
- Paint a black base (matte looks especially good here) and let it dry fully.
- With a thin striping brush and white polish, draw three or four straight lines fanning out from one corner of the nail.
- Connect the lines with small curved "swags," drooping slightly toward the corner.
- Add a second row of curves further out for a full web.
- Add a tiny black spider on a nude nail if you're feeling brave.
Shortcut: spider web nail stickers and water decals take about two minutes and look surprisingly hand-painted under a glossy top coat.
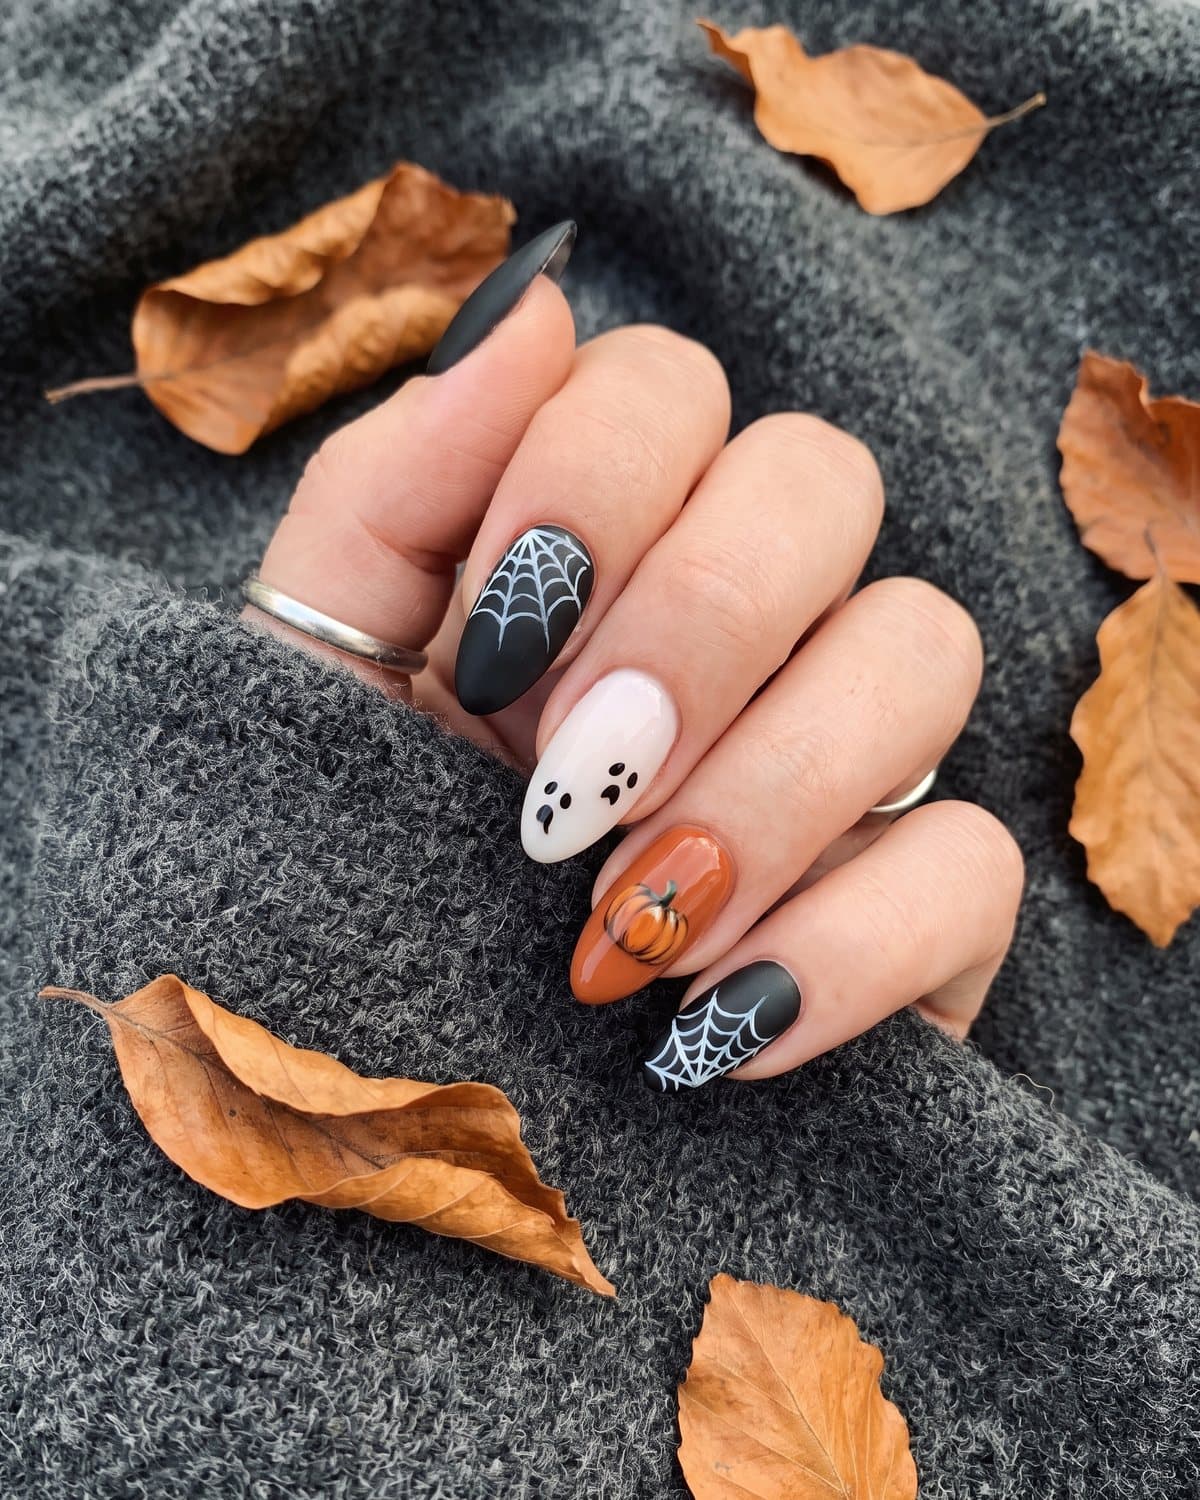 Spider webs on matte black, cute ghosts and a little pumpkin
5. Candy corn nails
Candy corn might be the most divisive Halloween treat, but candy corn nails are universally loved. The classic three-stripe gradient of white, yellow and orange looks bright, nostalgic and fun, and it's easy to do with a sponge. You can learn a little more about the history of the candy itself on Wikipedia's candy corn page.
Why it works: the stripes are bold and sunny, so they balance out darker Halloween designs on the same hand. It's also a clever choice if you want a Halloween manicure that isn't black.
How to get the look:
- Paint the whole nail white and let it dry.
- Paint the middle third of the nail yellow, then the tip third orange. Don't worry about perfect lines.
- For a soft gradient, sponge the colors on instead: paint a stripe of each shade side by side on a makeup sponge and dab it onto the nail.
- Clean the skin around the nail and seal with a thick glossy top coat to smooth everything out.
Pair it with: sheer nude nails with tiny black bats (see the next idea) so the bright stripes don't overwhelm the set.
6. Bat silhouette nails
Bat nails are a minimalist's favorite Halloween design. A sheer nude or milky base with one small black bat silhouette per nail looks chic, almost like a fashion print. On short nails, a single bat near the tip is enough.
Why it works: a lot of negative space keeps the manicure clean, while the black silhouettes are unmistakably Halloween. It's subtle enough to wear to work and fun enough for a party.
How to get the look:
- Paint a sheer nude base.
- With a fine detail brush, paint a small black oval for the bat's body.
- Add two wings: a curved line on each side with three small scallops along the bottom edge.
- Add two tiny pointed ears on top of the body.
- Let it dry, then top coat. Stickers are a great alternative for perfectly symmetrical bats.
Best nail shape: any. Bats look especially cute on short nails, where one tiny bat per nail reads as a delicate pattern.
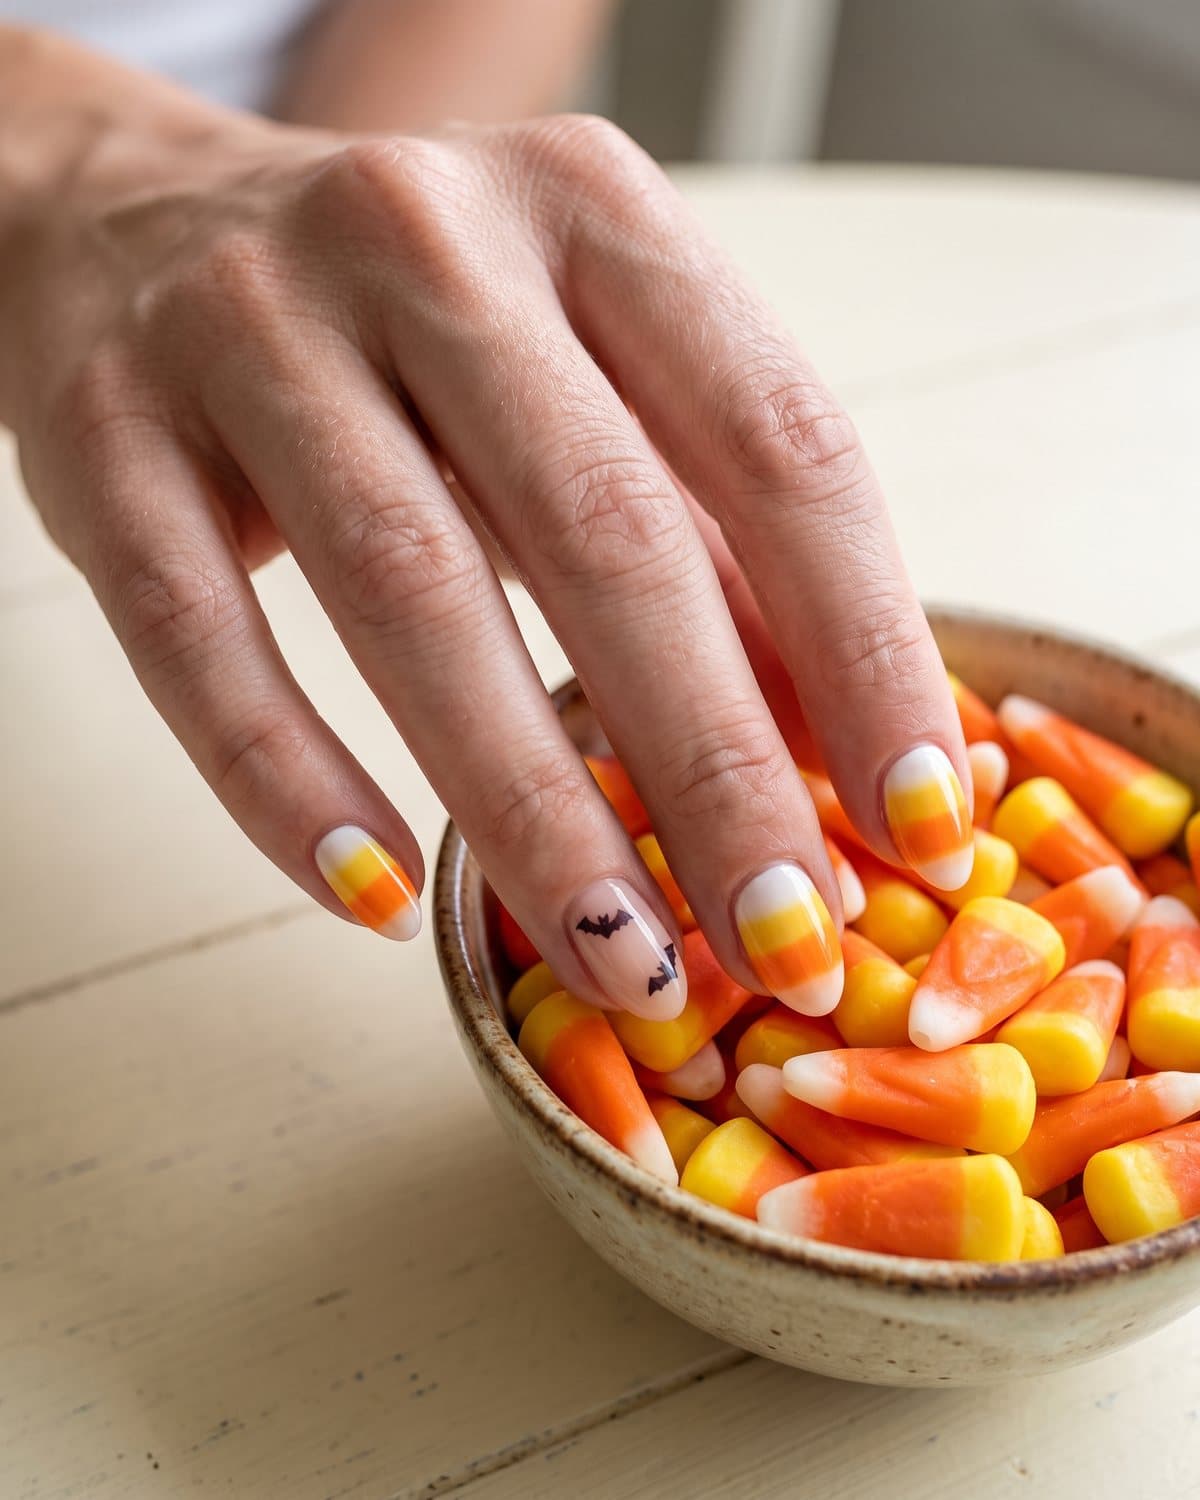 Candy corn stripes and tiny bat silhouettes: a bright, playful Halloween mix
7. Vampire blood drip nails
For costume parties and horror movie nights, nothing beats a drip. A milky white or nude base with glossy red "blood" dripping down from the cuticle is dramatic, a little gory and very photogenic. It's the perfect manicure for a vampire costume.
Why it works: the glossy red drip catches the light and looks wet, especially with a thick gel top coat. The white base makes the red look even more vivid.
How to get the look:
- Paint a milky white or pale nude base.
- With a dotting tool or a fine brush, paint a thick band of deep red along the cuticle line.
- Pull a few drips down from the band at different lengths and finish each one with a round droplet at the bottom.
- Let it dry and apply a generous layer of glossy top coat for that "wet" look.
- Add a single red rhinestone at the end of one drip if you want extra drama.
Good to know: use a true blood red with a slight blue undertone rather than an orange-red. It looks more realistic and more elegant.
8. Skeleton bone nails
Skeleton nails turn your hands into a tiny X-ray. White finger bones painted on black nails line up with your actual fingers, which makes this design both clever and a little creepy. It's a showstopper for Halloween parties.
Why it works: the design follows your anatomy, so the effect is striking even from across the room. On a black base the white bones stand out clearly.
How to get the look:
- Paint two coats of glossy black and let them dry completely.
- With a fine brush and white polish, paint one or two short bone shapes per nail: a straight line with a small rounded knob at each end.
- Leave a little gap between bones as if they were joints.
- Seal with a glossy or matte top coat. Matte makes the bones look chalky and more realistic.
Make it yours: mix skeleton bones with the drip nails from idea 7 for a full horror set, as in the photo below.
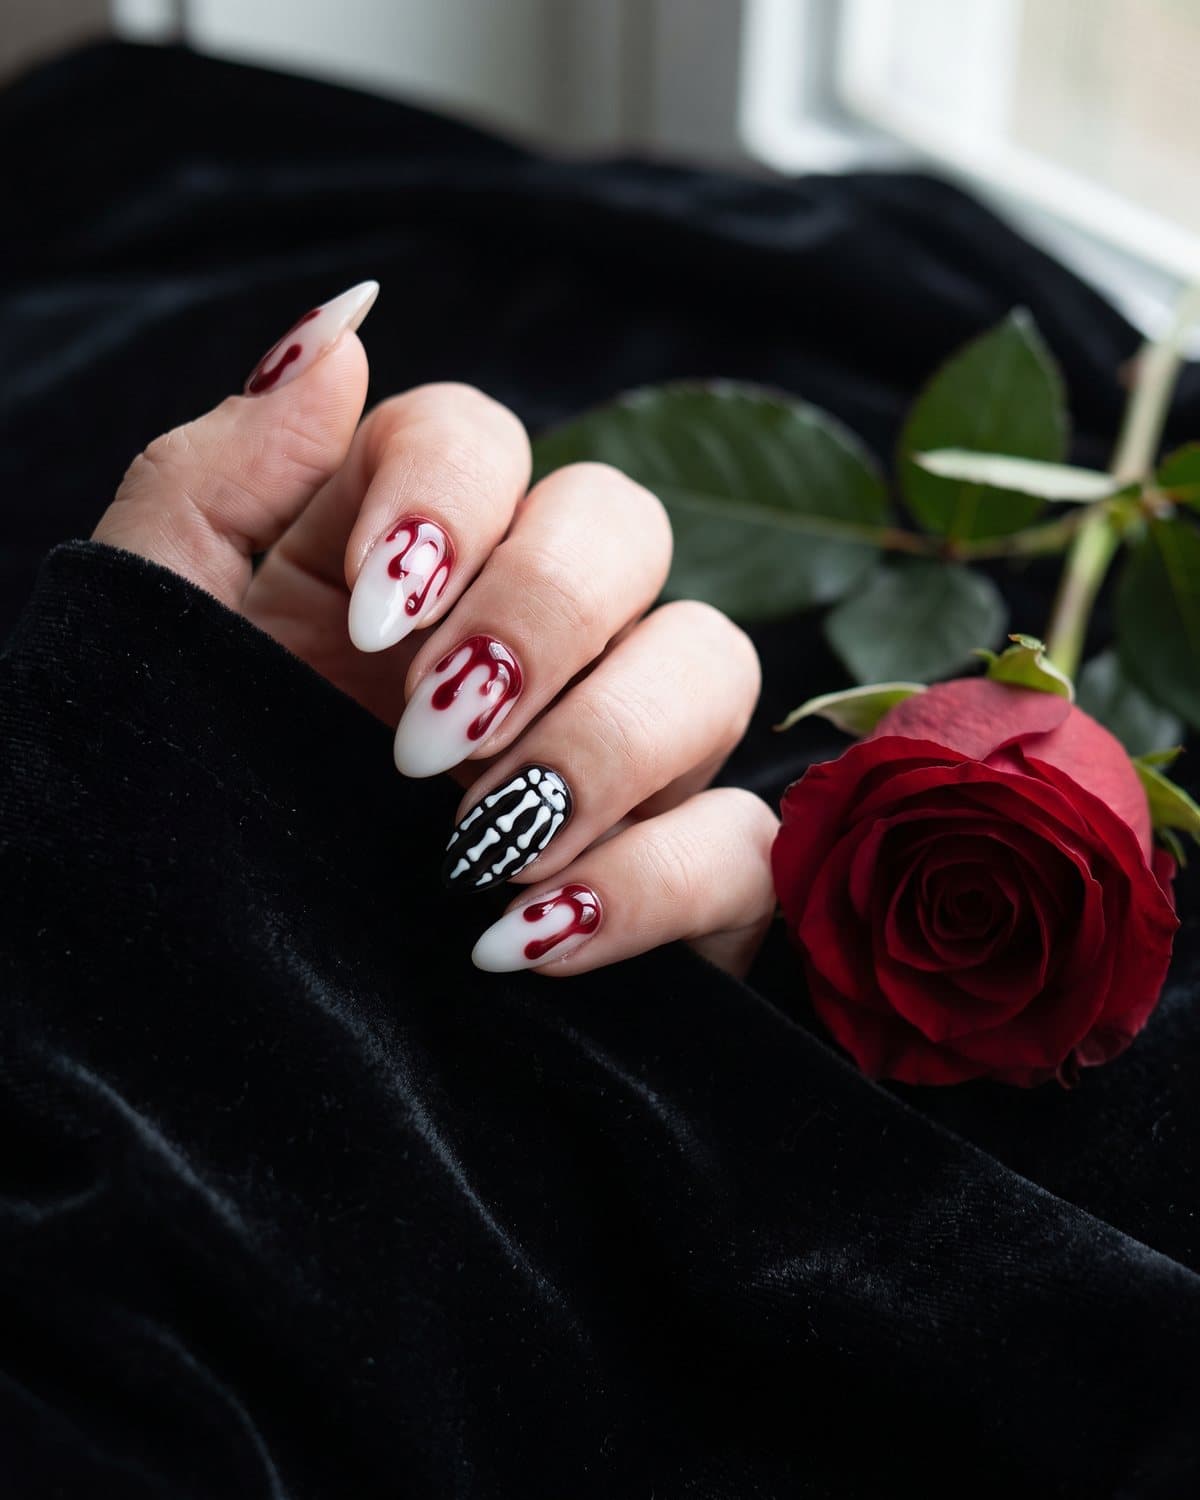 Vampire blood drips and skeleton bones for a dramatic Halloween party set
9. Eyeball nails
Eyeball nails are the boldest idea on this list, and the most fun to show off. A white nail with a realistic iris and pupil looks like it's staring back at you. Keep it to one or two accent nails, or go all in for a costume party.
Why it works: the realism is unsettling in the best way. Painting veins in thin red lines makes the eye look bloodshot and adds extra spookiness.
How to get the look:
- Paint a bright white base.
- With a dotting tool, place a colored circle (green, blue or brown) in the center of the nail for the iris.
- Add a smaller black dot in the middle for the pupil, then a tiny white dot for a highlight.
- With the thinnest brush you own, draw a few wiggly red veins from the edges of the nail toward the iris.
- Seal with a glossy top coat to make the eyeball look wet.
Shortcut: 3D eyeball nail charms are widely available and give you the same look with a dab of nail glue.
10. Black cat nails
Black cats are the cute side of witchy. A tiny black cat silhouette with glowing yellow eyes on a nude nail looks adorable, and it pairs perfectly with solid glossy black nails. If you love the mysterious side of October, our gothic nail ideas and witchy nail ideas have even more.
Why it works: the design is easy to read, works on short and long nails, and feels just right from early October through Halloween night.
How to get the look:
- Paint a sheer nude or milky base on your accent nails and glossy black on the others.
- Paint a small black oval body near the tip, a round head on top and two triangle ears.
- Add a curling tail with a fine brush.
- Place two tiny yellow dots for eyes; a dot of black on each makes a cute slit pupil.
- Seal with a glossy top coat.
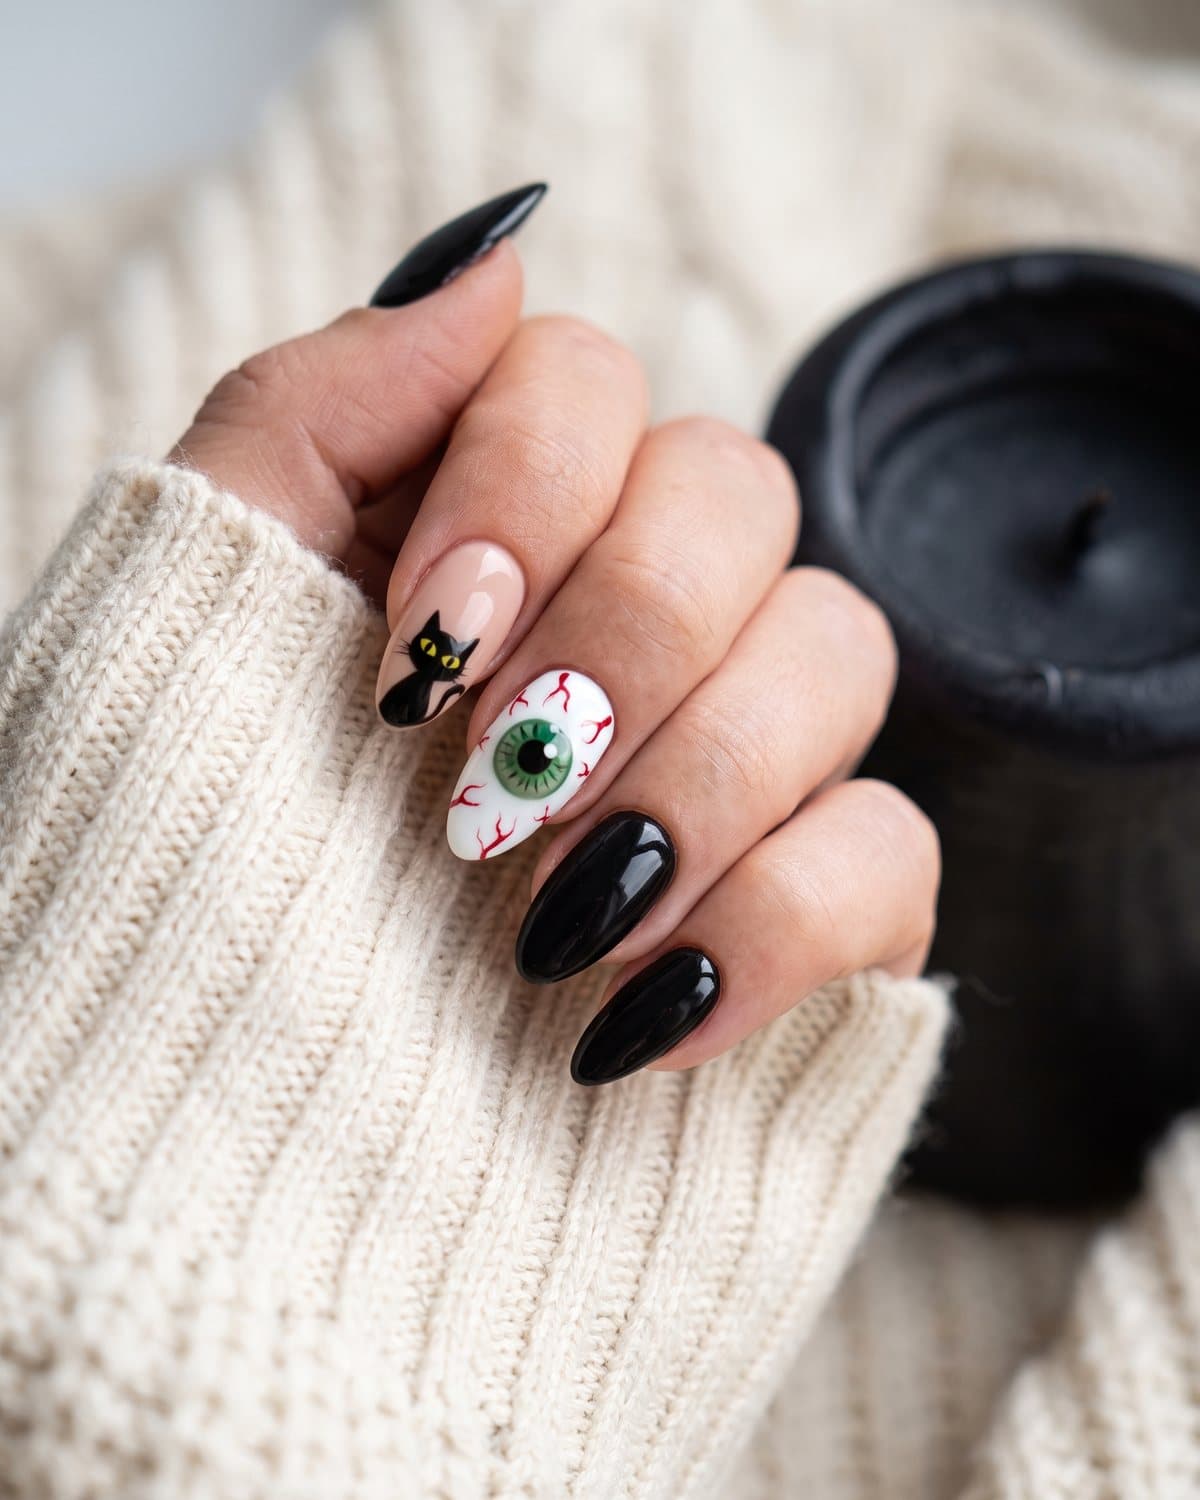 A black cat, a staring eyeball and glossy black: spooky-cute in one set
How to choose your Halloween nails
The best Halloween manicure depends on where you'll be wearing it and how much time you have:
- For work or school: choose black and orange French tips, bat silhouettes or a single ghost accent nail. They're festive but subtle.
- For a costume party: go bold with blood drips, skeleton bones or eyeballs, and match the design to your costume.
- For trick-or-treating with kids: cute ghosts, candy corn and pumpkins are fun and never scary.
- For the whole season: pumpkin patch nails and spider webs work from early October to Thanksgiving.
If you're short on time, combine one easy solid color (black, orange or milky white) on most nails with one or two accent nails of art. It looks intentional, and you only have to paint two designs. Halloween has been celebrated for centuries, and you can read more about the history of Halloween if you want inspiration from its older traditions.
Halloween nail art tips for beginners
You don't need a steady hand or expensive tools to get a great Halloween manicure. A few simple tricks make a big difference:
- Use the right tools. A dotting tool, a thin striping brush and a small flat brush for cleanup cover almost every design on this list.
- Let each layer dry. Nail art smears when it's painted on wet polish. Wait at least five minutes between the base color and the art.
- Try stickers and decals. Water-slide decals look hand-painted under a top coat and are perfect for webs, bats and skulls.
- Practice on a nail wheel. Practice tips let you test a design before you commit.
- Seal the art properly. Apply top coat with a light touch and a well-loaded brush so it floats over the design instead of dragging it.
Halloween nail care tips
Dark polish, glitter and layered nail art can be tough on nails, especially when it's time to take everything off. A few habits keep your natural nails healthy:
- Always use a base coat under dark colors to prevent staining.
- Remove glitter and heavy art by soaking cotton pads in remover, pressing them on your nails for a minute, then wiping gently.
- Don't peel off polish or gel; it takes layers of the natural nail with it.
- Apply cuticle oil every evening, especially when indoor heating starts drying out your skin.
The American Academy of Dermatology shares more dermatologist-recommended nail care tips, and the U.S. Food and Drug Administration explains what to look for on nail care product labels. Be especially careful with glow-in-the-dark and novelty polishes: buy them from reputable brands and follow the label.
Halloween nail FAQ
What are the most popular Halloween nail designs?
Spider webs, ghosts, black and orange French tips, pumpkins, bats and blood drips are the most searched Halloween nail designs. Black cats and eyeball nails are popular for parties.
What colors are best for Halloween nails?
Black and orange are the classics. Milky white is great for ghosts and skeletons, deep red for vampire looks, and purple and green for witchy designs. Glossy black is the easiest single color to wear.
Can I do Halloween nails on short nails?
Yes. Small designs like bats, ghosts, tiny pumpkins and micro French tips look great on short nails. Keep the art to one motif per nail and use a sheer base to make the nail look longer. Our short nail ideas have more tips.
How far in advance should I do my Halloween nails?
For regular polish, paint your nails one to two days before Halloween so they look fresh at the party. Gel manicures last two to three weeks, so you can book your appointment in mid-October and wear the design all the way through Halloween night.
How do I make Halloween nail art last longer?
Wrap the top coat over the free edge of your nail, reapply a thin layer of top coat every two to three days, and wear gloves when you wash dishes. Gel polish is the longest-lasting option for detailed nail art.
Save your favorite Halloween nails
Whether you go for subtle black and orange French tips, cute ghosts or a full horror set with blood drips and skeleton bones, Halloween is the perfect excuse to try nail art you'd never wear the rest of the year. Save this post to your Halloween board on Pinterest so you have it ready for your next appointment, and explore our fall nail ideas for cozy colors that carry you through to Thanksgiving. For more seasonal designs all year long, visit our seasonal nails hub.
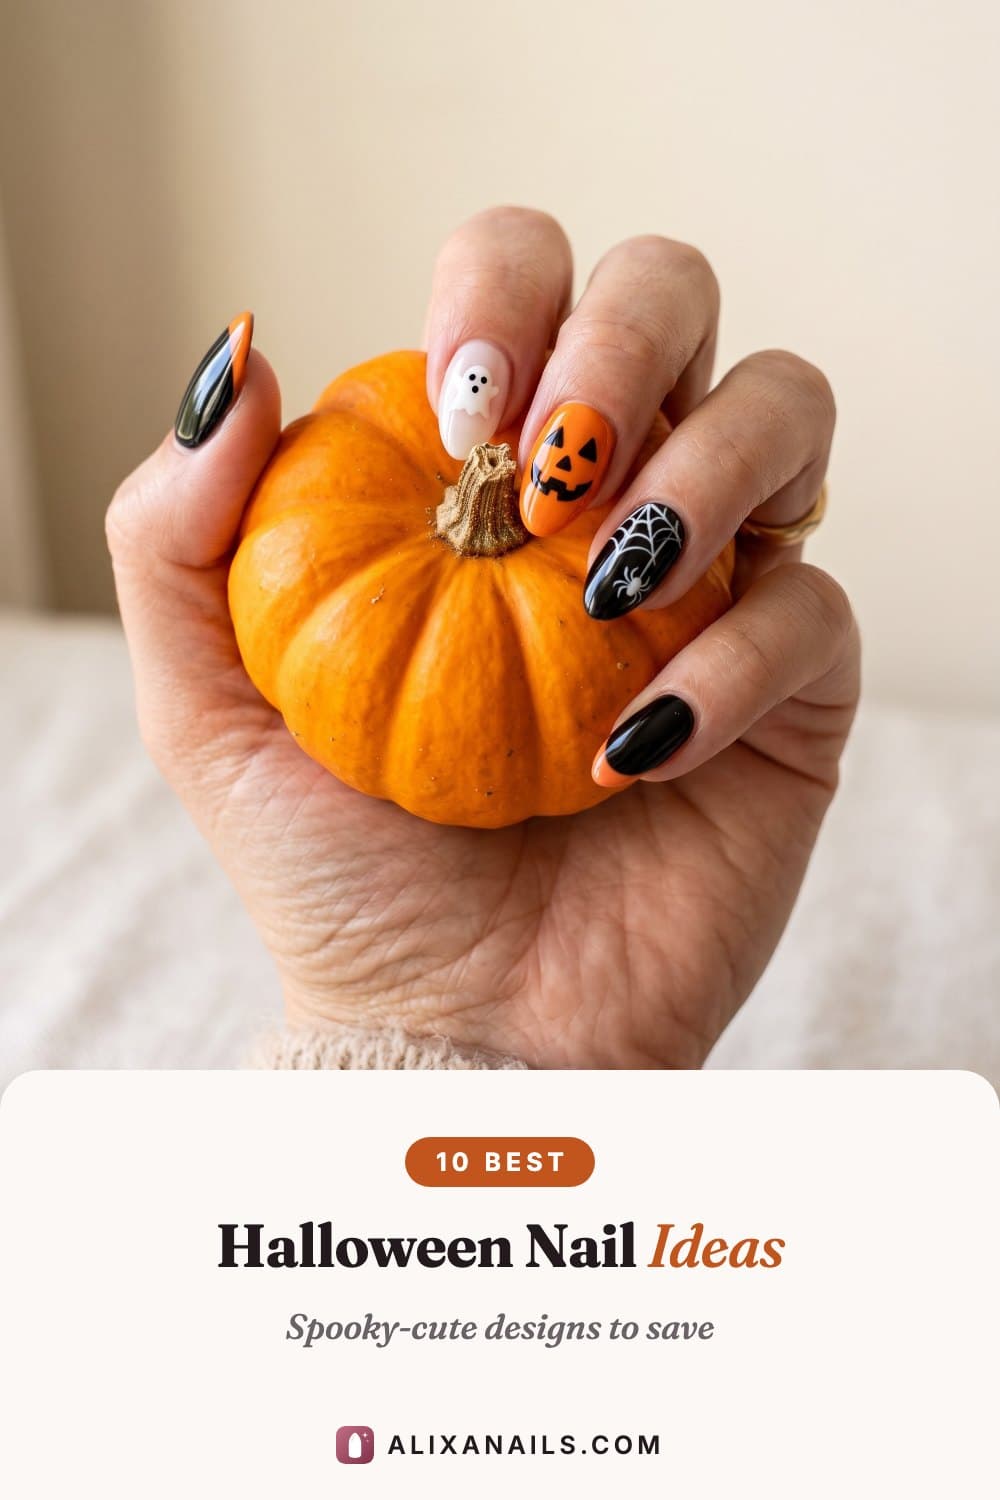
Save this for later
Pin these ideas to your nail inspiration board so you can find them at your next appointment.
Share these ideas